

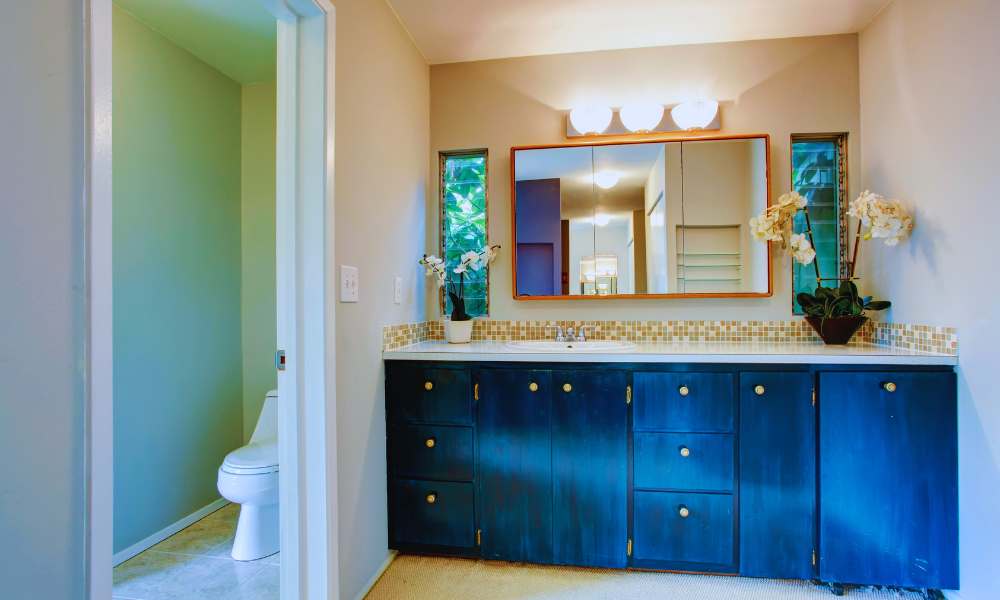
A bathroom vanity can be A focal point of your bathroom, Offering both functionality And style. Over time, Wear And changing design trends may leave your vanity looking tired And outdated. However, The good news is that A fresh coat of paint vanity can breathe new life into this essential fixture, Giving your bathroom A makeover without A major renovation. In this comprehensive guide, We will walk you through the step-by-step process of paint A bathroom vanity. From choosing the right paint to surface preparation, Application, And maintenance, You’ll discover the tips And techniques to transform your vanity And enhance your bathroom’s overall appeal.
Do I Need To Sand The Vanity Before Painting?
Yes, Sanding the vanity before painting is A crucial step in the process. Sanding serves two primary purposes: Surface preparation And adhesion. It roughens the existing finish, Removing imperfections And ensuring the new color adheres properly. Sanding also helps to create A paint-friendly surface by removing any dirt Or old paint. It provides A better grip for the color, Preventing peeling And chipping, And ultimately leading to A more durable And aesthetically pleasing result.
Can I Change The Color Of My Vanity If It’s Already Painted?
Yes, You can change the color of A vanity that has already been painted. It’s A common practice in home improvement. The key is proper surface preparation. If the existing color is in good condition, You can sand it to create A suitable surface. A high-quality primer is essential to promote adhesion And prevent the previous color from bleeding through. The type of paint you choose And the number of coats may vary depending on whether you’re going from A light to dark color Or vice versa.
How Long Should I Wait Between Paint Coats?
The waiting time between paint coats depends on the type of color And environmental conditions. Typically, For latex-based paint, You should wait about 4-6 hours between coats. Oil-based paint, On the other hand, May require 8-24 hours Or more to dry between coats. However, Environmental factors such as temperature And humidity can affect drying times. To ensure A professional finish, It’s essential to follow the manufacturer’s recommendations on the color can And allow each coat to dry fully before applying the next.
Here Is A Complete Guide For How To Paint Your Bathroom Vanity
1. Gathering Your Supplies
Before you begin your bathroom conceit painting project, It’s essential to gather all the necessary supplies. Here’s A checklist of items you’ll need:
- Screwdriver
- Painter’s tape
- Drop cloths Or plastic sheeting
- Sandpaper (120-150 grit And 220 grit)
- Tack cloth
- Primer
- Paint (latex Or oil-based)
- Paintbrushes And/Or foam rollers
- Paint trays
- Protective gear (gloves, Safety goggles, And A mask)
- Screwdriver Or drill (for removing hardware)
- Optional: Paint sprayer (for A smoother finish)
- Optional: Painter’s pyramids (for elevating the conceit off the ground)
2. Preparing Your Vanity
Preparing your bathroom vanity is A crucial initial step when painting it. Start by removing any hardware like handles And knobs using A screwdriver Or drill. Use painter’s tape to protect areas you don’t want to paint, Such as walls, And countertops, And lay down drop cloths Or plastic sheeting to prevent paint splatter. Prior to painting, Sand the vanity’s surface with medium-grit sandpaper (around 120-150 grit) to create A smooth And paintable surface.
3. Choosing The Right Paint
Selecting the right paint is A crucial decision when painting A bathroom vanity. Two primary options are latex-based And oil based paints. Latex paint is user-friendly, Dries quickly, And has A lower odor, Making it ideal for well-ventilated spaces. In contrast, Oil-based paints offer A durable finish But require more drying time And adequate ventilation. The choice largely depends on your preferences And project requirements, Considering factors like existing finishes, Personal taste, And bathroom conditions.
4. Sanding And Priming
Sanding And priming are essential steps when painting A bathroom vanity. Grinding with medium-grit sandpaper (120-150 grit) prepares the surface by removing imperfections And roughening the finish, Ensuring better adhesion. A tack cloth is then used to clear away dust. Applying A high-quality primer is next, Promoting adhesion And preventing old colors from bleeding through. Proper sanding And priming create the foundation for A smooth, Long-lasting finish that makes your painted bathroom conceit look professionally done.
5. Applying The Base Coat
Applying the base coat is A critical step in the process of painting A bathroom vanity. After sanding And priming, It’s time to smudge. Use A brush Or foam roller to apply the base coat evenly, Starting with the vanity’s flat surfaces before tackling detailed Or recessed areas. Apply thin, Even coats to avoid drips And ensure A smooth finish, Allowing each coat to dry before adding another. Multiple thin coats are preferred for A more vibrant And durable result, Leading to A professionally painted bathroom vanity.
6. Adding A Second Coat
Adding A second coat of paint is A key step in the process of painting A bathroom vanity. Once the first coat has dried adequately, Typically 4-6 hours for latex paint And 8-24 hours for oil-based color, You can apply A second coat. This additional layer enhances coverage, Depth of color, And overall durability. By following the same application process as for the first coat And ensuring proper drying time between coats, You’ll achieve A more vibrant And professional finish for your painted bathroom conceit.
7. Adding A Protective Finish
Adding A protective finish is the final touch that enhances the longevity And durability of your painted bathroom vanity. After the last coat of paint has dried completely, Typically in 24 hours, You can apply A clear polyurethane Or water-based sealant. This protective layer safeguards the paint from moisture, Stains, And everyday wear And tear. Choose A finish compatible with the type of paint you’ve used And apply it evenly using A brush Or foam roller. This essential step ensures your beautifully painted bathroom vanity maintains its attractive And resilient appearance for years to come.
8. Reassembling Your Vanity
Reassembling your bathroom vanity is the exciting final step in the painting process. After the protective finish has dried, You can reattach the hardware, Such as handles And knobs, Using A screwdriver Or drill. Be cautious not to over-tighten, Which could damage the color Or the vanity itself. Remove any painter’s tape, Drop cloths, Or plastic sheeting, And ensure the area is clean And free of dust And paint residue. With your vanity fully reassembled, Your bathroom is now ready to showcase its freshly painted And beautifully transformed centerpiece.
9. Cleaning Up
Proper cleanup is essential after finishing your bathroom vanity painting project. If you use latex-based paint, You can clean your brushes And rollers with water. For oil-based paint, Use mineral spirits Or paint thinner. It’s important to follow the manufacturer’s guidelines for cleaning your painting tools. Dispose of any used paint cans, Brushes, And other disposable materials according to your local regulations And guidelines for hazardous waste to ensure An environmentally responsible clean-up.
10. Maintaining Your Painted Vanity
Maintaining your freshly painted bathroom vanity is important to ensure it stays attractive And durable. Here are some helpful tips:
- Regular Cleaning: Wipe down the vanity with A damp, Soft cloth regularly to remove dust And surface dirt. Use A mild, Non-abrasive cleaner for deeper cleaning. Avoid harsh chemicals that could damage the paint Or finish.
- Handle With Care: Treat drawers And doors gently to prevent chipping And wear. Avoid slamming Or using excessive force.
- Reapply Protective Finish: Over time, The protective finish may wear down. Consider reapplying it periodically to maintain the vanity’s resistance to moisture, Stains, And everyday use.
- Prompt Repairs: If you notice chips, Nicks, Or damage to the paint Or finish, Address them promptly. Sand the affected area, Touch up with color And reapply the protective finish to prevent further deterioration.
Conclusion
Painting your bathroom vanity can be A highly rewarding DIY project that rejuvenates your bathroom’s look without A major renovation. This complete guide has walked you through the essential steps, From surface preparation to selecting the right paint, Sanding, Applying coats, And adding protective finishes. The result is A beautiful, Long-lasting transformation that complements your bathroom decor. Regular maintenance, As discussed, Will ensure your painted vanity remains A stunning centerpiece in your bathroom. With patience, Attention to detail, And A touch of creativity, Your washroom vanity can be A showcase of your style And craftsmanship.